Installation Guide for Apple Mail (MacOS)
Step1:Copying the Email Signature
- Open the HTML file of your email signature in Chrome and ensure it is opened in Chrome.
- Locate the "Click me to Copy Signature" button and press it to copy the signature.
- Once clicked, a dialog box will appear to ensure the signature is copied successfully.
.png)
Step2:
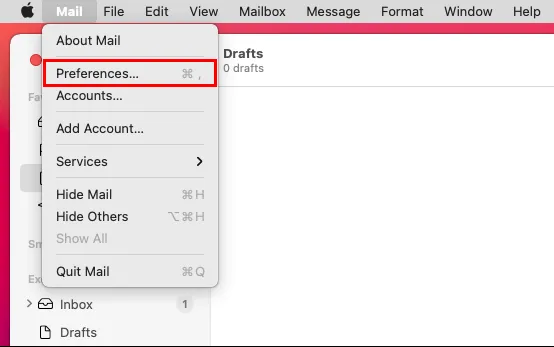
open Apple Mail and click Mail, and then Preferences
Step3:
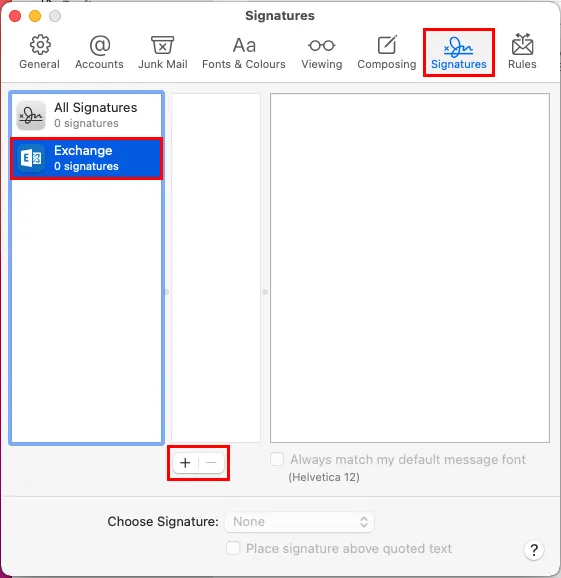
Click on the Signatures tab at the top.
In the left column, select the email account you want to create the signature for, then click the + symbol.

Step4:
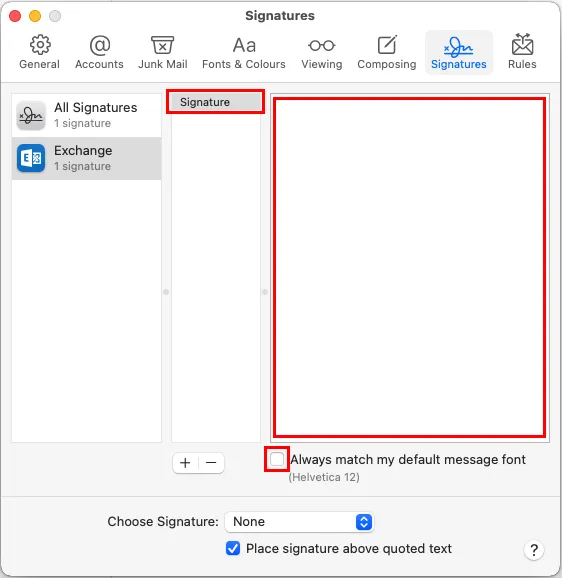
In the middle column, type a name for your new signature.
Ensure you untick the box at the bottom which says “Always match my default message font” as this will turn your email signature into plain text.
In the right column, remove any text that may be there and then paste your new or updated email signature (or press ⌘CMD+V) in there.

Important: If your email signature is still showing up as plain text (even after unticking the box which says “Always match my default message font”), try ticking the box at the bottom which says “Place signature above quoted text” and this should make your email signature appear in HTML.
Step 6:
Close the Preferences/Signatures window, click to compose a new email and enjoy your new signature!
Notes:
- If the images in your email signature aren’t appearing and you’re only getting a gray outline or a blue question mark where your images should be, you will need to check the following settings on your device:
For macOS 11 Big Sur and below: Mail > Preferences > Viewing tab > Ensure that Load remote content in messages is ticked.
For macOS 12 Monterey and above: Mail > Preferences > Privacy tab > Ensure that Protect Mail Activity is ticked. If Protect Mail Activity is not ticked, ensure Block All Remote Content is not ticked as well.